> For the complete documentation index, see [llms.txt](https://docs.edgeport.com/product-docs/llms.txt). Markdown versions of documentation pages are available by appending `.md` to page URLs; this page is available as [Markdown](https://docs.edgeport.com/product-docs/service-menu/settings/access-control.md).
# Access Control
The **Settings > Access Control** menu section is dedicated to the meticulous management of your application’s access permissions.
Through this configuration module, you have the capability to intricately define access rules, whether for specific users or entire subnets (up to /22), based on IP addresses. This approach ensures a highly controlled and secure environment for your service, bolstering your data protection efforts.
So, let’s see in more detail how to manage the [White List](#h.vp01ity4qc8y) and [Black List](#h.138y676bhghi) of IP addresses.
### The White List
The white IPs list is required to tell the system to allow user(s) with particular addresses to access the service bypassing all the security checks and restrictions, ensuring a smooth and uninterrupted experience for trusted parties.
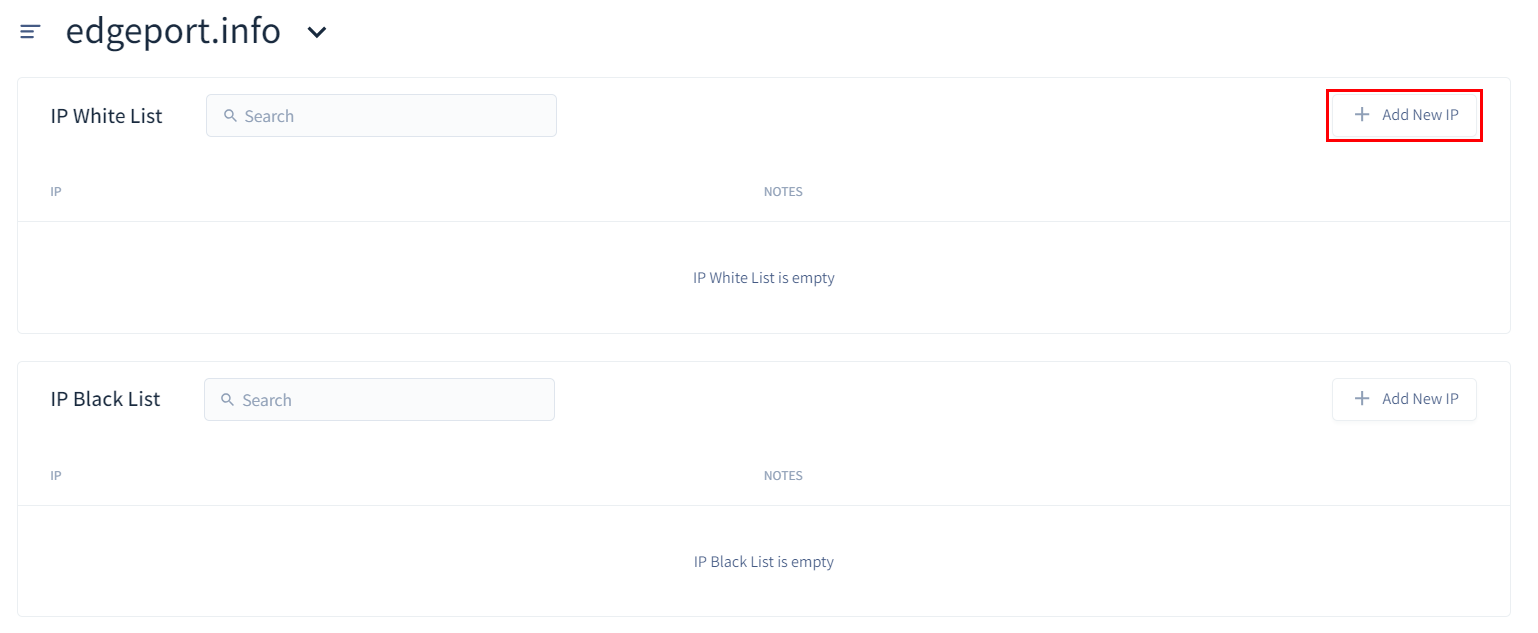
To add an IP to the white list, click the **Add New IP** button in the right part above the appropriate ***IP White List*** frame:
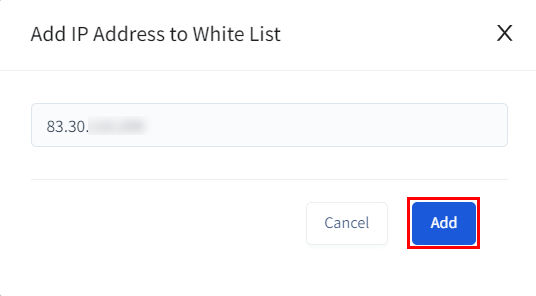
In the displayed pop-up window, enter the required IP address (or a subnet mask, up to /22 bit-length) and submit it by selecting **Add**:
To remove the previously added IP address at any time, click the bin icon next to the appropriate line and confirm this action:
The changes for both adding and removing IPs from the list take effect immediately.
### The Black List
The black IPs list comes in handy in case you need to restrict access to your application for a certain IP address due to security reasons, such as preventing unauthorized access or blocking potentially malicious traffic.
The flow is completely similar to the one described above - select the **Add New IP** button above the corresponding ***IP Black List*** section:

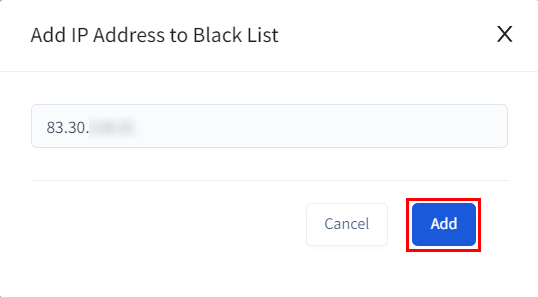
In the popped-up window, paste the required IP address and click **Add**:
The specified address will instantly appear on the list, and access to the service for it will be denied.
{% hint style="info" %}
**Note** that for the Black IPs list, you can only add specific individual addresses and not subnets.
{% endhint %}
The address removal can also be performed in no seconds - just click the bin icon within the appropriate line and confirm the initiated action:
Any modifications, whether adding or removing IPs from the list, take effect immediately.